Thursday, May 31, 2012

Go-to: banana bread

Do you have a got to recipe?
This is a recipe that my friend sent to me and now is a monthly  go to.


The Recipe comes from none other than Martha Stewart
Found here
(You see a theme this week, Martha and Food, oh yea!)


Ingredients

  • 1/2 cup (1 stick) butter, at room temperature, plus more for pan
  • 1 cup granulated sugar
  • 2 large eggs
  • 1 1/2 cups unbleached flour
  • 1 teaspoon baking soda
  • 1 teaspoon salt
  • 1 cup mashed very ripe bananas
  • 1/2 cup sour cream
  • 1 teaspoon vanilla
  • 1/2 cup chopped walnuts or pecans

Directions

  1. Preheat oven to 350 degrees. Butter a 9-by-5-by-3-inch loaf pan; set aside. In an electric mixer fitted with the paddle attachment, cream butter and sugar until light and fluffy. Add eggs, and beat to incorporate.
  2. In a medium bowl, whisk together flour, baking soda, and salt. Add to the butter mixture, and mix until just combined. Add bananas, sour cream, and vanilla; mix to combine. Stir in nuts, and pour into prepared pan.
  3. Bake until a cake tester inserted into the center of the cake comes out clean, about 1 hour 10 minutes. Let rest in pan for 10 minutes, then turn out onto a rack to cool.

    What is your go-to banana bread recipe?


signature

Tuesday, May 29, 2012

Try-it Tuesday: Green Onions

Here is a new-ish series I am trying.
Pin it, Try it, and Tell me about it.

1. You never have to buy green onions EVER AGAIN!
2. IT IS SO EAY!
(Yes i am actually so excited I am yelling this at you.

So I found this on Pinterest from this site


You buy onions, cut them use them. put them in water

and ta-da! They go crazy (this is after 2 weeks)
Let me preface this with I can't grow jack.
I was really surprised how easy this was. 

Have you tried this or something like it?

signature

Sunday, May 27, 2012

Oh, Martha!

Sorry that I have been MIA guys. Well, i am back with a week full of posts of course,
 cause thats how I roll.

Heres to mini monday makeover.
Well, I got the bug to get organized. Our kitchen cabinets are wonky and nothing is of stand size or width.
This is how the baking cabinets looked before:

I know what your thinking, its not that bad.
OH YES, yes it is. 
Theere are boxes of tea up in that right hand corner that are over two years expired and I really don't know how far they go back (thanks Starbucks). The top left had several opened bags of things that needed a home. The bottom right had misc. ingredients and were hard to find. 

And the after:
With the help of some extra containers and some patience I came up with this


Much better. And the break down..


The inside of the tea basket, all organized


 I also decided to tackle our tupperware cabinet


I moved all of the storage containers to another shelf that i could reach and have easier access to. I bought the wire basket from Lowe's for $5.99 (and I love it)


So there you have it my mini monday kitchen organization makeover.
Have you organized anything lately?


signature


This post will be linking up to all of these blogs

Tuesday, May 22, 2012

Sweet Nothings

My husband writes me sweet nothings even if he is not around and when I find them, I smile from ear to ear.


I also got a poem today:
My days are long,
My bed is cold.
But when the labs have flown their last box,
and the planes are back in their spots,
My weekends with Stephanie are nothing but joy.

I know it made you throw up in your mouth a little.
Thats ok, you'll get use to it.

signature

Saturday, May 19, 2012

Are you "Hooked" yet?

In case you missed it.
This is the post I did  (last week) that was part of Trading blog hosted by Serendipity and Spice.
I traded blogs with Kristin from Brilliant like Fireflies


You can find her post here

First off, I want to Thank Melissa from Serendipity and Spice for hosting V.2 of trading blogs guest posting party 


My name is Steph, the hostess of  Pumpkin Loves, the blog for a little of everything. I am a public health nurse during the day and a derby girl at night as seen here , as well as trying to start an Etsy shop and make our house a home as seen here .  

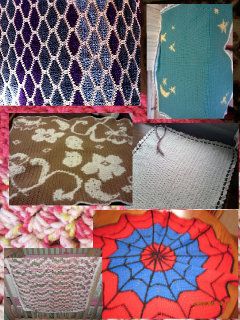
Today I wanted to talk about crocheting. I know a lot of people look at that word and tense up. What? I don’t know how to do that, is that the one with one stick or two hooks? I can’t make that.. That is too hard. Well, all of your skepticism is WRONG! Any body can crochet. Crocheting is no longer for your grandma.

Rachel at  Maybe Matilda  has a wonderful tutorial series on crocheting as seen here , I am not going to reinvent the wheel, because she did an amazing job and I could not have done a better job.
I love crocheting and find it very relaxing. (If you didn’t know this, I am a very busy body and have to be doing something at all times). 


Crocheting is something I do while I watch my favorite programs on tv. I have been crocheting since I was about 19. I learned as a child, but had no interest. I have done many projects with different varieties of difficulty. Yes, this may be intimidating at first because you can’t get your tension right or keep a straight line, TRUST ME I know how you feel.


 My very first adult sized blanket is my favorite thing I have ever made. As you can see it is a trapezoid. Don't be intimidated, just go for it.  


I hope you try crocheting; I would love to see what you come up with.

Thanks again Kristin and Courtney for having me.


signature 

Thursday, May 17, 2012

week 10 part 1

When you think of Roller derby the first imagine that comes to your mind is usually hot tattooed girls wearing fishnets and beating each other up.

Well, your not wrong but you are definately not right.
Yes there are some girls that fit this "sterotype" (i write that word loosely)
And some girls don't. What you don't know is that derby girls come from all walks of life and have their own story to tell. These women are moms, grandmas, nurses, scientists, and professionals during the day.

This is not the topic of this post though.
What you don't know is all the intracacies of a derby league.

Our league has over 88 skating memebers and countless non-skating members who make it happen.
The intricacies of this league remind me a lot of the cast of rhps in LA. So much so that we have talked several times about how this is the adult rocky for us and gives us the same thrill and ability to dress up and not stay up as late and be with people our own age (as opposed to being the "older crowd).

Anyways, I was a farmer as posted about here
Our league requires you to go through a 10 week farmer program. The program culminates with a WFTDA minimum skills test in, which you have to convince 5 coaches you are a compintent skater and wont hurt yourself or others while skating.
Well, It has been 10 weeks and I happy to report I PASSED my skills test and am now a rookie.

(us after we tested with our coach)

What does this mean?
Well, I am a real derby girl now
I am on a team, the Vice Quads 
I can bout and scrimmage and I am draftable.

Pretty awsome, right? i think so.

Stay tuned for what I learned and what I have been trough in the last 10 weeks in part 2.


signature

Sunday, May 13, 2012

Plan A-head

For as long as I can remember, I have always had a planner/organizer for school
Generally it was the oversized version for keeping track of tests, classes, clinical, work schedule, etc.


Usually very similar to this and yes it has mostly always been color coded. 
Well, my needs changed once I became a f/t employee no longer with a school schedule.
So I have noticed that this planner is not cutting it and I have to paper clip other things to my planner and I have separate pieces of paper with numbers on it and it was cramping my clean cube style.

So, I was in search for a new planner. 
1. I bought a smaller version of the above one for $4 from Walmart 
Similar to this one and once again not meeting my style requirements, as well as the calendar section not starting till July it was kinda a pain. When I decide I want things, I want them now not 2 months from now. 
So I returned it.

2. For some reason I thought an even smaller version of this would work, so i bought it


It didn't and the spaces were even smaller making it pretty much useless, plus it was $10, just not worth it to me. So i took it back. 

3. I started doing my research on making your own and thought made a mini binder would work similar to this

So I purchased the mini note book for $5.99 (with a $4.00 rebate) from staples
and thought about how I could make it cute, but it wasn't working for me. So I took it back.

So you with me so far; $20 spent and returned and the journey continues..

4. So, I got to thinking maybe there was no way I would be happy unless this project was completely DIY and that started a steam roll effect for me.


I bought 8x8 chip board from hobby lobby for $1.29 using a 40% off coupon
and I bought some cover paper from Michaels for 0.79 using a 40% coupon as well and some notebook rings from Target for $2.00.

I already had some book cloth from Paper source from a previous project as well as some RCA glue (also from paper source), I use it as modge podge because thats just what I have.

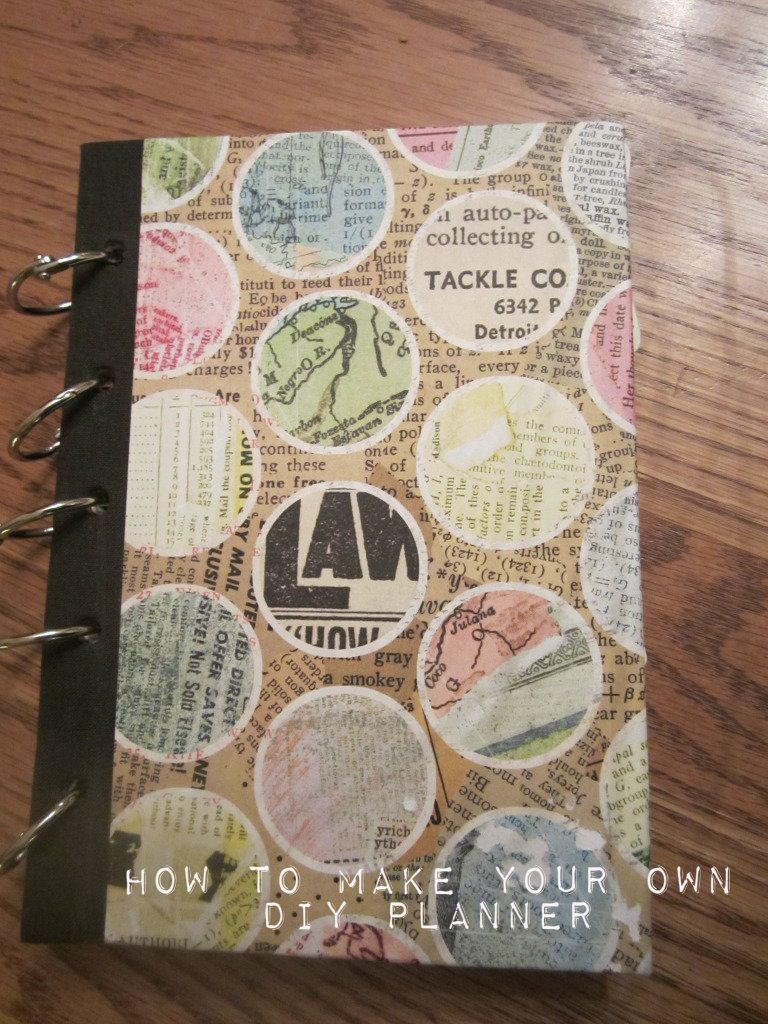
I used the basic knowledge of book binding or applying a cover for book binding to apply the cover and backing.
The basics:  the book cloth first than the paper of choice. It is very useful to have a bone folder, to even out folds during this process and smooth away excess glue. But be careful if your paper is too wet it will rip if you crease your paper with the bone folder.

This is what the front and back covers look like. 

I picked a roughly larger than 5x7 size for this planner so that it can go in my purse or work bag easily.

The next page I knew I needed pockets. 
To reinforce the pocket and tab pages I took old kraft paper (used from already made cards cut in half) and glued to the paper of my choice creating a more sturdy feel.


For this pocket I used an old vintage style paper and some old vellum and sewed on the pocket with the heart, I kinda love that the pocket is not in your face, but more subtle. 

For the innards of my planner, I used already made templets from Ahhh Design


I loved the vintage feel of the calendars and other templets


I also used the weekly printout, appointments and contact sections. 
I printed double side about 10 pages of each (for now).


I made tabs from a stencil I had with the flourish design on it, this is one of the things I will probably change in the near future. As you can see they kinda blend in with the rest of book and aren't very clear or colorful. 


One of the things I love most about this planner is the ability to take things out or add what you need by using binder rings they can easily open and close to add things. 
I know I am not done customizing it, but I love the direction it is headed. 

 For less than $4.00 my wallet is pretty REALLY  happy as well

Anybody else disappointed in the selection of planners that are out there? What did you do about it?


signature


This post will be linking up this week, please see above tab with all of info

Saturday, May 12, 2012

Guest Post: Kristin & Courtney

First off, thanks Steph for having me here! I am so glad that I got paired up with you for Trading Blogs at Serendipity and Spice. I am an avid reader of your blog and love your projects.


I am Kristin and, with my sister Courtney, I write from Brilliant Like Fireflies.  We are from Ontario, Canada and love to share our crafts, favourite recipes, DIY projects and more! Right now my hubby and I are living the big city life in our basement apartment with our cute-as-a-button cat, Merlin. Courtney is living a couple hours away in her 2-story loft apartment enjoying the quiet, small town life.


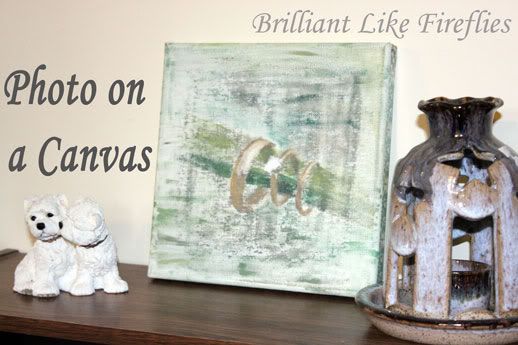
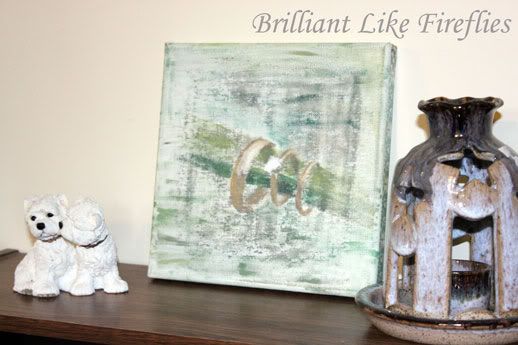
I love to make art work that looks hard, but is actually really easy. My mom gave me the idea of transferring a picture on to a canvas and then adding some paint. The end product is a beautiful piece of original art. It may look like I painted the whole thing, but I really just added a bit of paint here and there.


Step 1

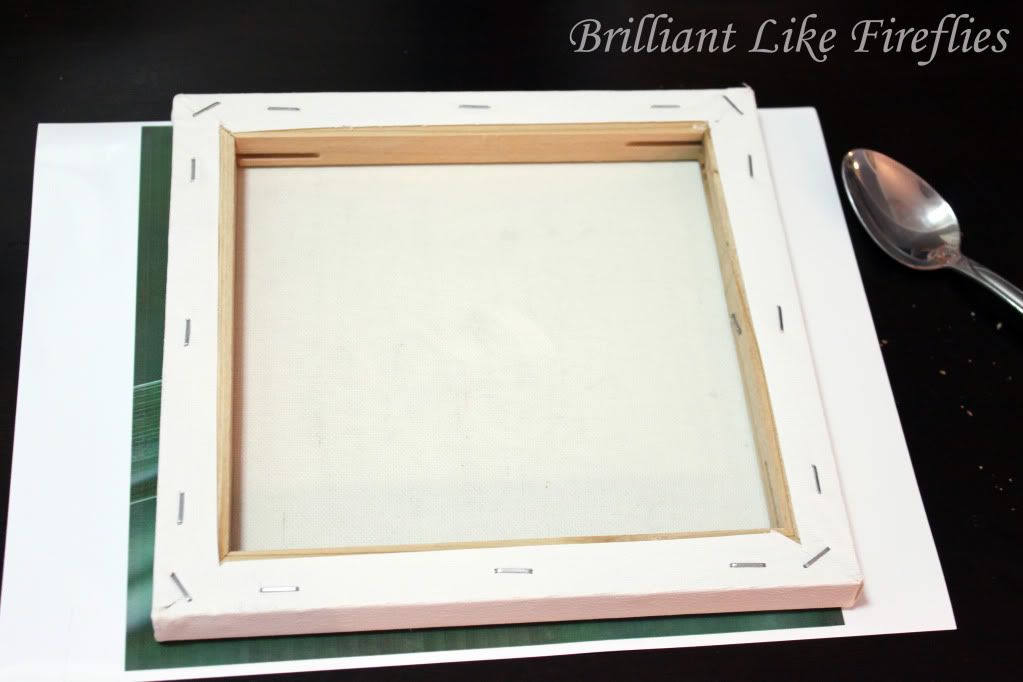
Find a canvas that is smaller than an 8.5 x 11 (mine is 8 x 8). Completely wet down the canvas. Print your picture on glossy photo paper. Immediately, while the ink is still wet, place the canvas on top of the paper. Press hard on the canvas evenly. I used a spoon, but you can use anything that is hard and flat.


Step 2

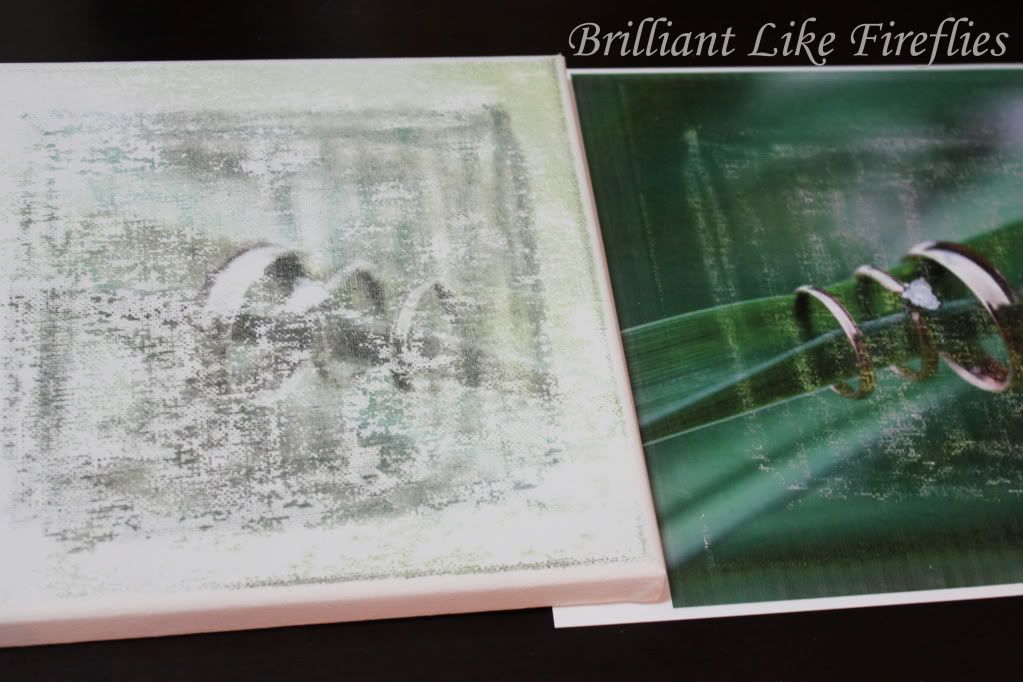
Remove the paper from the canvas. Look how beautiful this faint picture is! You could just leave it as is. But I wanted to highlight some parts and make other parts a little darker.


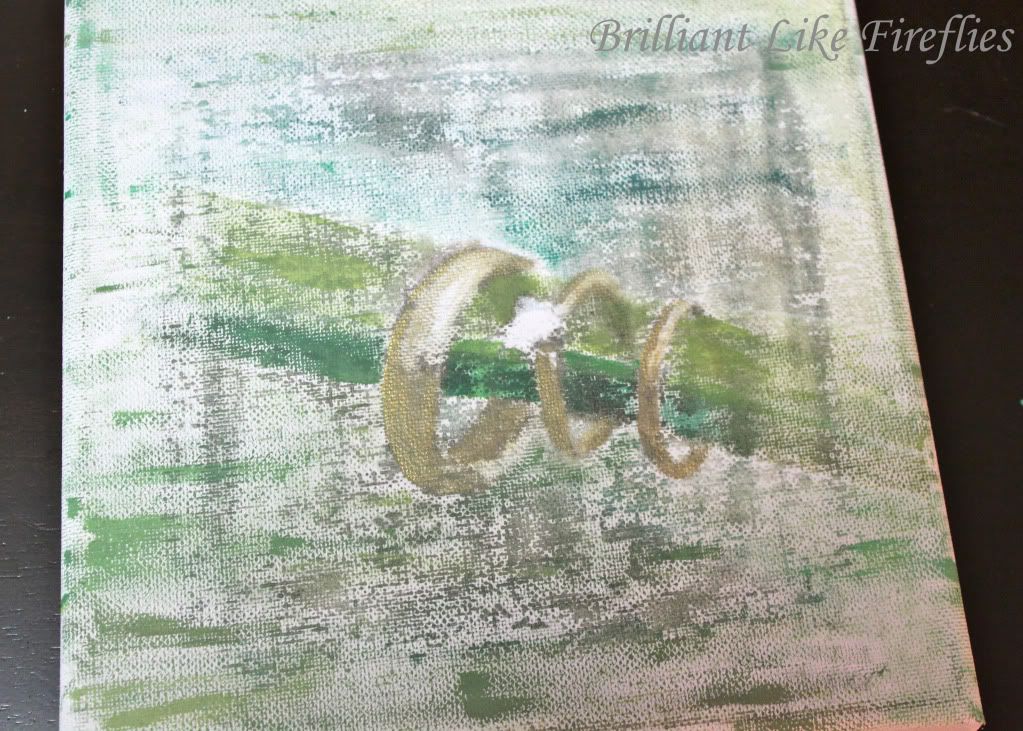
I got out my collection of paints and got down to work. I loved this project because I didn't have to draw anything from scratch. You just add some paint to a picture that is already there. It makes it look professional.


Photobucket


Step 3

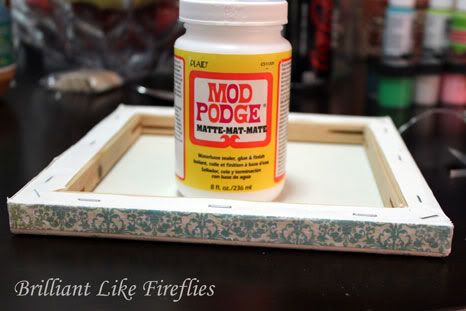
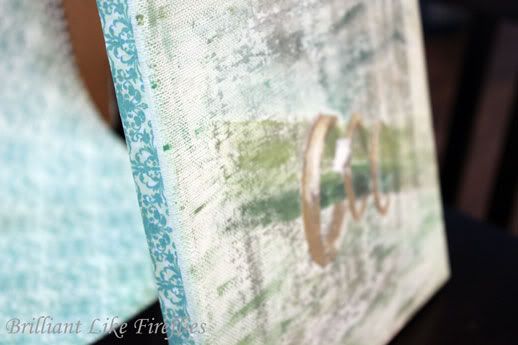
Cut strips of paper to fit the sides of your canvas. I found scrap booking paper in my drawer that matched the colours in the painting. Use Mod Podge to glue the paper on.


It was easy as that. I'm giving this to my husband for him to put up in his new office. 


Thanks for having me on Pumpkin Loves! I had a great time. If you liked my project I hope you'll pop on over to Brilliant Like Fireflies for a visit to see what my sister and I are up to.


Happy Crafting,


Thanks Kristin and Courtney for sharing and stopping by.

You can find my post at Brillant like Fireflies


signature

Friday, May 11, 2012

This month I participated in Trading blogs by Serendipity and spice


Tomorrow..
Guest Poster Kristin from Brilliant like Fireflies will be here to share how to do a photo canvas
Photobucket


signature