
For as long as I can remember, I have always had a planner/organizer for school
Generally it was the oversized version for keeping track of tests, classes, clinical, work schedule, etc.

Usually very similar to this and yes it has mostly always been color coded.
Well, my needs changed once I became a f/t employee no longer with a school schedule.
So I have noticed that this planner is not cutting it and I have to paper clip other things to my planner and I have separate pieces of paper with numbers on it and it was cramping my clean cube style.
So, I was in search for a new planner.
1. I bought a smaller version of the above one for $4 from Walmart

Similar to this one and once again not meeting my style requirements, as well as the calendar section not starting till July it was kinda a pain. When I decide I want things, I want them now not 2 months from now.
So I returned it.
2. For some reason I thought an even smaller version of this would work, so i bought it

It didn't and the spaces were even smaller making it pretty much useless, plus it was $10, just not worth it to me. So i took it back.
3. I started doing my research on making your own and thought made a mini binder would work similar to this

So I purchased the mini note book for $5.99 (with a $4.00 rebate) from staples
and thought about how I could make it cute, but it wasn't working for me. So I took it back.
So you with me so far; $20 spent and returned and the journey continues..
4. So, I got to thinking maybe there was no way I would be happy unless this project was completely DIY and that started a steam roll effect for me.

I bought 8x8 chip board from hobby lobby for $1.29 using a 40% off coupon
and I bought some cover paper from Michaels for 0.79 using a 40% coupon as well and some notebook rings from Target for $2.00.
I already had some book cloth from Paper source from a previous project as well as some RCA glue (also from paper source), I use it as modge podge because thats just what I have.
I used the basic knowledge of book binding or applying a cover for book binding to apply the cover and backing.
The basics: the book cloth first than the paper of choice. It is very useful to have a bone folder, to even out folds during this process and smooth away excess glue. But be careful if your paper is too wet it will rip if you crease your paper with the bone folder.
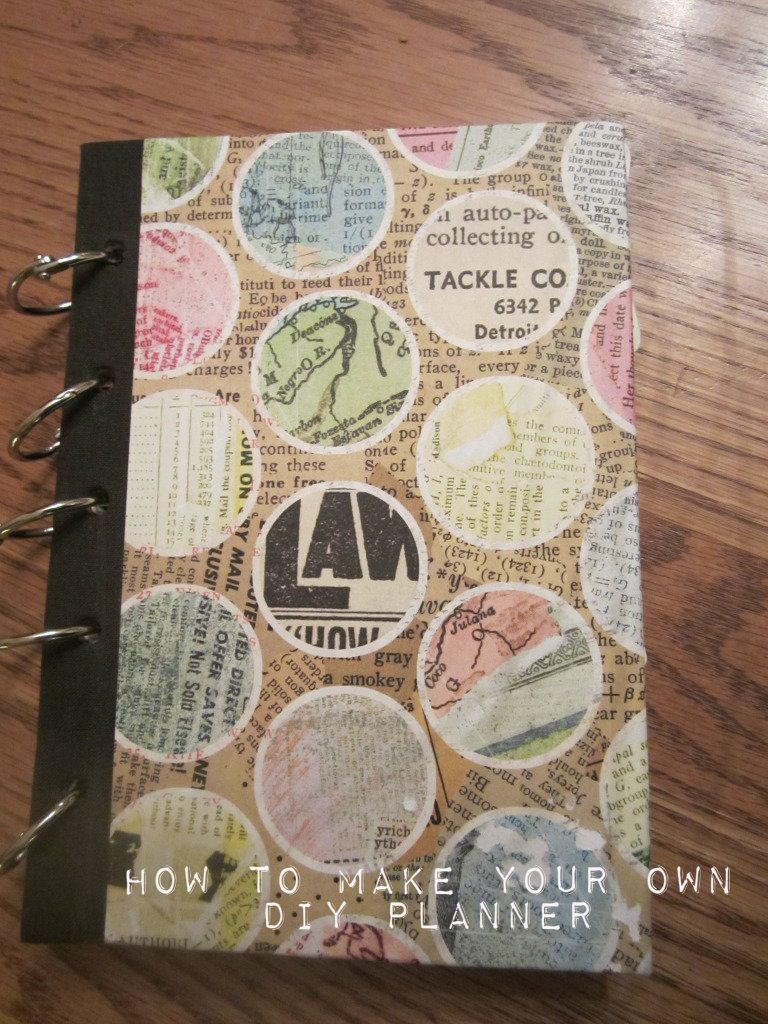
This is what the front and back covers look like.

I picked a roughly larger than 5x7 size for this planner so that it can go in my purse or work bag easily.
The next page I knew I needed pockets.
To reinforce the pocket and tab pages I took old kraft paper (used from already made cards cut in half) and glued to the paper of my choice creating a more sturdy feel.

For this pocket I used an old vintage style paper and some old vellum and sewed on the pocket with the heart, I kinda love that the pocket is not in your face, but more subtle.
For the innards of my planner, I used already made templets from Ahhh Design

I loved the vintage feel of the calendars and other templets
I also used the weekly printout, appointments and contact sections.
I printed double side about 10 pages of each (for now).

I made tabs from a stencil I had with the flourish design on it, this is one of the things I will probably change in the near future. As you can see they kinda blend in with the rest of book and aren't very clear or colorful.
One of the things I love most about this planner is the ability to take things out or add what you need by using binder rings they can easily open and close to add things.
I know I am not done customizing it, but I love the direction it is headed.
For less than $4.00 my wallet is pretty REALLY happy as well
Anybody else disappointed in the selection of planners that are out there? What did you do about it?

This post will be linking up this week, please see above tab with all of info


What a great planner! I laughed at all the options you went through and returned! Love the end product!
ReplyDeleteThanks for linking to a Round Tuit!
Hope you have a fabulous week!
Jill @ Creating my way to Success
http://www.jembellish.blogspot.com/
This is a neat planner! I really need something like this to become more organized. Thanks for sharing. I would love to follow but I don't see a button. Take care.
ReplyDeleteI added a follow me section to the right of this post. I am really sorry about that.
DeleteWhat a great idea! That makes me thing of using personal pictures on the front and creating planners with a personal touch for gifts.
ReplyDeleteLove that planner! I love them too. :)
ReplyDelete! was also disappointed in the selection available. I had used a large calendar my d-i-l sent, with pics of the grandkids, l but it was too large, and the great photos were messed up \by the end of the year. Also, it wasn't very portable. So I bought a 5" x 8" planner, with a double page spread for each month's actual calendar, and a double spread for each week with a space for each day. I am a great list maker, and doing a new list for each day was rediculous, so I converted the days of the week to "do", "call", "out","groceries", etc. I then attached a lined paper notebook on the bak for all the random notes and reminders I scribble down. Of course, I decorated all the end papers, and added pockets.l Love those pockets. THEN, to make it extra efficient, I just piled a watercolor sketch book on, and sewed a length of thick black elastic, decorated with a metal "jewel-y thingy" to used as a book band, and I'm ready to go! Sure took me enough time, just like with you. We need what we need, and we need it now, and if it's not available, we'll invent it for ourselves, by golly!
ReplyDelete